(Update February 23, 2014. Since originally publishing this article, have decided that this subject is extensive and requires its own blog. As such, please also visit our new video editing blog for much more material and tutorials on the subject of video editing. Only freeware is used in the tutorials, and download links are provided with each article.).
There are actually quite a few very good, and more importantly, totally free video editing software programs. But similar to photo recovery software, the no-kidding freeware programs are very hard to find by a simple Google search. You may come across some that claim to be free, but will ask for payment at that last moment as you try to save your file, or place a watermark on your saved files which can only be removed by payment. Some also show prominently in Google, but may be just awful, difficult to use, or are very outdated programs. This article will focus only on the newer, high quality, HD capable, and most importantly no-kidding freeware video editing software programs. Detailed tutorials on their use in basic (splitting, cutting, transitions, etc...) and advanced video editing (chroma key, picture in picture,...) may be found here.
FileLab Video Editor
The first program to be featured in this article is FileLab Video Editor. FileLab includes a wide selection of preset video effects, similar to Windows Movie Maker. BUT it also has customizable color correction to include brightness, contrast, hue, saturation, and gamma (usually only pay programs let you do that). Also included are many many video and transition effects beyond what WMM offers. Additionally you can fine-tune and adjust many of these preset effects & transitions by right-clicking on them in the timeline (WMM doesn't let you do that).
Other stand outs that make it different from other freeware video editing programs is FileLab's excellent title editor. Also, your video can be saved in many different formats beyond just WMV. You can conduct easy filesaves in formats for Web Videos (YouTube, Facebook, TwitVid ... all saved as H.264), 720p HD (DivX, Xvid, MPEG-2, H.264/AVC), along with presets for IPhone, iPod, iPad, Android, XBox360, PS3, PSP. But even with all these features, the program has been designed to be very easy to use, and it is.
There are some cons to this program. The first is that it runs from the cloud in your browser window as a "plug-in" program. But that may be good for some as it doesn't really require a software install. But it does require internet connectivity to run in your browser. And to save your final video, you must login to either Facebook, Google, or Yahoo. The program may be run or downloaded from here.
The following are video summaries of the FileLab free video editing software program, showing some of its more important features. They were each created with FileLab:
"Picture in Picture" Video Editing with FileLab
FileLab Free Video Editing Software
VSDC Video Editor with Green Screen!
VSDC Video Editor is currently freeware as a beta release. It's a very advanced video editor on-par with most advanced payware editors, but yet it's relatively easy to learn and use. It's currently one of the few freeware programs that has "chroma key" "green screen" editing capability. I'm aware of only two other freeware programs with chroma key capability (Debugmode WAX and Zwei-Stein), and both are very difficult to use as compared to VSDC.
With VSDC you can edit and save in most popular video formats and compression schemes including high definition (HD), AVI, H.264, MP4, MKV, MTS, 3GP, WMV, QT, MP3, MPEG2 FLV, SWF. YouTube. You can download it from herewhile it's free because eventually this will go payware. Sadly, when that day comes it will be removed from this article as only freeware gets featured in this blog. And here are some video tutorials on using VSDC Free Video Editor:
Editing with VSDC Free Video Editor
VSDC Green Screen (Chroma Key) Editing (Yes, you too can now be abducted by aliens!)
Multiple Split Screen Editing!
(I apologize for my singing abilities and my webcam's microphone)
Freemake Video Converter
Freemake is a new breed of "All-in-One" video processing programs. And as the word infers, it is totally freeware, no trial periods, no watermarks, nothing. It's no-kidding freeware. But because of its gaining popularity, I'm sure that one day this program will include some means of monetization for its makers. But for now, I'm very happy with it and use it quite frequently.
Freemake, the ultimate Swiss Army Knife of video processors. Freemake is the easiest program that I've seen to convert all those short video clips from your digital camera into a final production that you can view on your DVD, BluRay, or just about any other device that can play videos, no matter the format. FreeMake can convert your videos into just about all the main video formats used by smartphones, tablet, and even many game and mp3 players.
Capabilities include:
- DVD Ripper/Converter - for converting DVD's to other formats, such as viewing on mobile devices. Or just making backups of your DVD's (let your conscience guide you where you can go with that).
- DVD and Blu-Ray burner capability - for viewing your videos on BR and DVD players.
- Video downloader and uploader - for downloading/saving your favorite videos from YouTube, Facebook, Vimeo, Dailymotion, + many many other websites. With its built in video uplaoder, it also makes it very easy to upload your own videos to YouTube (the uploader only supports YouTube at this time).
- Basic Video Editor - for clipping, splicing, joining. Also can modify each of you video clips audio level individually from the editor. Only 2 transitions available, none or Fade transition. But really these are all you need. Nothing emphasizes a lame video more than tumbling, swirling, transitions.
- Video converter with customizable video resizing, bitrate and audio modification. Also included is subtitle support, so that you can view your movies with their subtitles on your various devices.
- Device video presets, or you can set and save custom video presets for your particular device.
- Photo alideshow maker with user inputted audio (You can load up any audio that you please. Some other free video makers may force you to only use their preset music).
- Audio converter and extractor. Save the music or audio track from any video as an mp3 file. If you desire, you can modify the sample and bitrate for your saved file.
The following video was created with Freemake. It goes over each of the above abilities in more detail so that you can see for yourself, and judge whether FreeMake might be for you. If you think that you'd like to try this free program, you may download Freemake directly from Freemake here. You might want to remember to pay particular attention to uncheck any ad-supported toolbars that may be offered during the installation process (why did CNET start doing that?). The program also requires Microsoft's .NET Framework 4.0 to run. Usually this is installed on most newer PC's. But if Freemake doesn't run on your computer, you likely need to also install NET Framework. It's very easy, and you can install .NET FW 4.0 for free directly from Microsoft at this download link. And here are some tutorials on Freemake:
YouTube HD Editing and Upload with Freemake
(It just doesn't get any easier than this!)
Freemake Free Video Converter Software
VSDC Video Converter
Brand new release (August 2012)!! VSDC another "All-in-One" video processing programs. It is also totally 100% freeware. Has most of the capabilities of Freemake, but has some additional conversions that Freemake does not currently have (such as Real Media RM conversion). It also does not require MS NET Framework, and runs just fine on most PC's. Recommend that you try both Freemake and VSDC to see which best suits you. Can't go wrong as both are free. Download VSDC here.
If this information helps you, please pay it forward, and share this article with others who may be experiencing the same problem. Your help in sharing will be appreciated, and karma will prevail! For those attempting to recover lost or accidentally deleted photos or videos, see this linked article instead. For those who've simply forgotten their card's password, scroll down to the bottom of this current article. For those that have taken many previous photos with the card, but suddenly your camera or computer wishes to "format" the card, see the "corrupted card procedures" located near the bottom of this linked article instead. For those with Compact Flash (CF) cards, please see this article instead. Finally, for those that are still here with SD card problems, please continue reading.
First of all, here's a video summary of the steps. But please remember to also read each of the Fixes listed in the article, along with user comments as they contain additional tips that the video doesn't cover.
Video: SD Card Problems and Fixes
FIX 1: I know that you probably already have checked the card's slide switch, but I just want to first present this for others with the same problem who may not be aware of this switch. Other options besides the slide switch are presented further in this article.
Please check to make sure that you didn't accidentally place the tiny locking slide switch on the side of your SD card in the "locked" downward position. The correct "unlocked" position should be slid up toward the direction of the connectors. If you discover that the locking switch is actually missing or has broken off, proceed directly below to Fix #4a.
Card Switch in Downward "Locked" Position
(note the arrow by the word "Lock") Card Switch in Up "Unlocked" Position
FIX 2:Old cameras and the card readers on older computers just can't read 4GB or higher SDHC cards. If this problem is just happening after purchasing a brand new card, AND your camera is an older camera (about 2008 or older), I'm going to guess that you just bought a new 4GB or larger SDHC card. If the above is true, continue reading. If not true, skip to Fix 3.
Although the SDHC card looks exactly the same as a standard SD card, the format the card uses is very different. Unfortunately your older camera was likely designed before the SDHC format came out. Sorry, but a SDHC card may not work with your older camera (check your camera maker's website for your model). You probably will need to use standard SD cards only (usually those 2GB or less). They're relatively inexpensive these days, and can easily be found on Amazon if your local store doesn't carry less than 4GB cards.
SDHC Card (Left) vs. Standard SD Card (Right)
FIX 3: If you've had the card for a while, but it just recently started to show "memory card error" or "card requires formatting", ask yourself if you can ever remember formatting your card IN THE CAMERA. If you can't remember doing such (or don't know what a format is) continue reading. But if the description above doesn't apply to you, skip to Fix 4.
An unformatted card will initially work fine in a camera, but eventually will corrupt with time, especially after many files have been saved and deleted. A card can also corrupt if camera power is interrupted during the write process (such as changing batteries or batteries dying while the card is still writing the last picture taken). Formatting the card in the camera will correct both these problems, BUT it will also erase all photos on the card. AFTER you've recovered any important photos (please see this other article from this blog that shows how to recover your photos from a corrupted card), format the card in your camera to prevent this from happening again (dig out your instruction manual to figure out how). Stating this once again, formatting will also totally erase your card, so only do this after you've recovered and saved to your computer any important photos from the card.
FIX 3A: If file corruptions are occurring occassionally or intermittently (such as for every few files or movies taken, the camera states "file unrecognized" or something similar), take a close look at your card to determine its "Class", or in other words its write speed. Written on the face of the card should be the word Class with a number, or a number circled with a capital "C". See the above photo for an example of a Class 6 card (on the left), with an older/slower unmarked card on the right. If neither "Class" or "C" is written, the card is likely Class 2 or lower. Today's newer cameras take very high-resolution pictures, AND high-definition videos. File sizes can be very large. Some of the older SD cards just cannot keep up with the write speed required to save these files before you're ready to take another picture. As a result, some of your files can become corrupted if you're using older cards with newer cameras. The fix in this case is to purchase a higher speed card for your newer high-performance camera (recommend Class 6 or better). Or you can also wait a few seconds between shots/videos before switching modes or taking another picture (to ensure the write is completed), but that can get to be annoying after a while.
FIX 3B: Again, if file corruptions occur intermittently, AND you use a card reader, do you remove the card properly from the reader? When ejecting a memory card from its reader, recommend that you always select the "Safely Remove Hardware and Eject Media". This selection is located in the bar in the lower right-hand corner of your computer screen (if using a PC).
FIX 4:The famous "toothpick" fix (first presented here on DIY Digital Camera Repair). If you've tried the above techniques, and it's still showing locked, it's likely that the locking switch inside the camera's card slot is stuck. If you look inside the slot on the side of the slot where the SD card slide switch would be, you'll see a glint of gold color on the side. This is the camera's lock/unlock switch. The other glint's of gold that you may see at the far end of the slot are the reader's connectors (ignore those).
Camera's SD Card Lock/Unlock Switch
Somehow, the locking switch is making contact and has become stuck in the locked position (a single grain of sand can jam it there). With a plastic toothpick, or other skinny NON-METALLIC item, tap and gently push against this switch to see if you can jar open the contact to its normal unlocked position. Also try blowing compressed air at it, to clear out any gunk that may have worked its way in there, jamming it closed. Occasionally, reinsert the SD card to see if the issue has been corrected.
Fix 4A: The famous "tape" fix (sorry, I can't claim this one). If none of the above seems to work, or if you've found that you've broken the locking tab on the card, one final thing to try before opening the camera is good old tape. Cut a tiny piece of clear cellophane tape (use scissors to trim it), and place it tightly over the slot where the locking switch is, or was. I can't stress it enough, keep the piece of tape small, you don't want to jam your card in the camera. Now slide the card into the camera. If you encounter any resistance, STOP, the tape is likely too thick or too much. But if not, proceed and see if that corrects the problem.
Taped Locking Tab Slot
FIX 5: If you've come this far and you're still getting a "card locked" error, it may be time to consider opening the camera to force open this switch, or to inspect its wiring (not recommended unless you have some familiarity with electronics). In this case please see this blog article instead (xscrewdriver, hope you don't mind me referencing your blog).
LOST PASSWORDS FIXES
Forgotten passwords can be recovered using the following procedures (from kioskea.net).
Lost Password Fix One:
1. Open the file manager of your mobile
2. In Settings choose system folders,
3. In the System folder, find a file called mmcstore
4. Send the file to your PC using IR/Bluetooth
5. Open the file in Notepad
6. The password you need for your memory card is located within that file
Lost Password Fix Two:
1. Insert your card into your phone, without accessing it through the phone
2. Run FExplorer and Open the path C:\system
3. Find the file called mmcstore, and rename it mmcstore.txt
4. Copy that file (mmcstore.txt) to your PC and open it in Notepad
5. Your password will be located within that file.
For Nokia Users with MicroSD :
Put the card in any E series mobile or N95 etc and format it. It will not ask for a password.
Note: owners of Canon PowerShot S400 cameras, please see this first (you just might get this problem fixed for free!).
For all others, Oh No! Your favorite compact flash camera all of a sudden has started giving you CF memory card errors. You've tried several different memory cards, and it's still the same thing. Your camera is inoperative due to this error. Don't fret, you just might be able to fix this problem yourself.
Take a look inside your camera's CF card slot. It's very likely that you may have a bent pin in there. If so, remove batteries and card. Use a small/skinny jeweler's flat screwdriver to bend the pin back as close as possible. The jeweler's screwdrivers that you see at the dollar store will work fine. Another tool that I sometimes use is a stiff wire with a bent hook on the end to get very flattened pins started. Take your time and use as much patience as you can muster (take a breather in between if needed). Just keep nudging it upward/straighter a "tiny bit at a time". Whatever you do, don't try to unbend it with one push/nudge, you won't be able to do it.
It doesn't have to be perfect, just as close as you can get it. When it's the best that you can get it, take your flash card and "SLOWLY" insert it. The card itself should fine-align the pin. Remove the card, and verify that the pin is still straightened. If so, reinsert the card and try it out.
For those of you owning Canon A400 series (A400 through A490), please see this link after trying the below troubleshooting steps, as you may also be experiencing a broken shutter ribbon cable.
A stuck shutter is a common failure mode for digital cameras. Unfortunately some model cameras experience this more than others. I won't say which but you'll likely notice in the comments section which cameras these are. The symptoms of a stuck or "sticky" shutter are very similar to CCD image sensor failure. The camera may take black pictures (for shutter stuck closed), or the pictures may be very bright and overexposed, especially when taken outdoors (for shutter stuck open). To confirm a stuck shutter, put the camera in any mode other than "Auto", and turn the flash OFF (you don't want to blind yourself for the next step). Next look down the lens and take a picture. You should see a tiny flicker in the center of the lens as the shutter opens and closes. If no movement is seen, then you likely have a stuck shutter.
If you did see movement, then you are possibly experiencing CCD image sensor failure. As mentioned, the symptoms of a stuck shutter are very similar to CCD failure. If you own a Canon or Sony camera, please see the following two articles instead as your camera might possibly be eligible for free repair:
Unfortunately, actual mechanical repair of a stuck shutter is labor intensive as the mechanism is buried deep inside your camera. If the camera is out of warranty the cost of this repair is usually very high, and may be more than the value of the camera. Would not recommend trying to open your cameras to repair this yourself, as it's very unlikely that you'll succeed. However, there is something simple that you can try that might unstick it, albeit it may be only a temporary fix. Also would not recommend that you do this on a perfectly working camera, as I'm not sure what the power interuptions may do to the camera. As usual, only think of doing this procedure as a last resort for a camera that repair cost is out of the question, and as such the camera would otherwise be set for disposal:
Step 1. Turn the camera on. Also turn off any features that may be a power drain to the batteries. You want all available power from the batteries for the following steps. Turn off image stabilization if your camera has that feature. Put the camera in any mode other than Auto, and turn off the flash. Also turn off the LCD screen (press the DISP or DISPLAY button).
Step 2. Move the camera to any mode that will give you the longest exposure time without flash. For many Canon cameras this will be shutter priority (Tv) mode (for many Canon A models the wheel with AUTO,M,Tv,...). For some of the Canon SD models this is also known as "Long Shutter Mode" (select the Moon/Stars icon).
For cameras other than Canon, set the camera so that it will take the longest possible exposure, usually 15 seconds (15"). Many cameras may not have shutter priority mode (Tv). Instead, put the camera in manual mode and turn off the flash. With these settings, try the fix in a darkened room, opening the battery door immediately after taking the picture. The darkened room without flash should give you a prolonged exposure, hopefully giving you enough time to conduct Step 4 while the shutter is trying to move.
Step 3. Take a picture.
Step 4. After 7 seconds open the battery door for a few seconds and then close it again. The intent is to momentarily interupt power during the exposure time. Note that you may also open the battery door immediately after pressing the shutter button if your camera is not capable of taking 15 second exposures.
Step 5. Repeat the procedure until the shutter becomes unstuck. One person reported on Fixya doing this 15 times before his shutter became unstuck.
Supposedly the power interuption while the shutter is trying to open can "jog" the shutter open. Some people have reported success with this method, and they noted that it required many tries.
Step 5a. Alternative Fix (use caution!). Please use common sense and care if you decide to try this technique, as there is some obvious potential for further damaging your camera with this step. If the above five steps don't work after many repeated tries, several readers have reported success in jogging the shutter open by tapping the camera against a wooden surface.
Step 5b. Alternative Fix b. If 5a scares you, others have reported success with an alternate method of merely extending the lens and then gently tapping around the extended lens barrel with a pen or pencil. Every once in a while check down the barrel to see if you notice lens flicker when taking a picture. If none noted, continue tapping. I have personally repaired two different Canon SD1000's by merely gently flicking the end of the lens barrel with the tip of my index finger while taking a picture.
Gently Tapping Around the Extended Lens Barrel
Anonymous reader of July 25th offers two more Steps:
Step 6a: In a very dark room to open the camera's iris, switch back and forth on the selector dial from picture taking mode to playback mode. Keep switching back and forth between modes until the shutter opens. Gently tap on the lens housing with a pencil or pen while conducting these cycles.
Step 6b: Again, in a very dark room, place the camera in shooting mode and then open and close the battery cover. No need to place the camera in Tv mode or set to 15 second exposure. Any shooting mode will do while you open and close the battery door. Keep repeating until the shutter opens. Gently tap on the lens housing with a pencil or pen in between tries.
IMPORTANT, Post-Repair Step: If you succeed in fixing your camera, note that this may also be only a temporary fix, and you may be required to do it again. To minimize this potential, place the camera in "Continuous Shutter" mode, and take a large amount of pictures continuously to attempt to lubricate the shutter (you can delete those pictures later). Also, try to use your camera more often as another preventative measure from reoccurrence.
Note that cameras with shutters that are stuck open (overexposed pics) can be particularly difficult to repair with the above techniques. But I do know that Step 5b can work for both stuck open and stuck closed shutters (of those SD1000's that I've repaired, one was stuck open). Hopefully you'll be lucky too. But if not, it may be time to consider retiring the camera.
Finally, please comment below whether you succeeded or not with this technique along with your camera model. Also note how many tries you gave it. If you know of another method, please also report that here.
This question comes up a lot. A new or used camera owner may run into camera software issues. They'll plug in their camera, but for some reason their computer fails to see or recognize the camera. Another problem is they may lose or may never have had the USB cable or needed software that came with the camera. Is there any other way to get the photos or videos off the camera and onto their computer?
First of all keep in mind IMO the only reason that the camera companies include a capability for cable download is to get you accustomed to using their bundled software that came with the camera. In most cases this software is rather pitiful, again IMO. If you absolutely must use photo organizing or editing software, there are much better freeware options available than what came with your camera (a future blog post is brewing).
But as a solution to downloading your photos, I highly recommend that you instead consider using a card reader to move the photos or videos to your computer. Card reader's do not require software (although Windows 98 and earlier may require drivers), are very inexpensive, are much faster downloading files from the camera, do not use the camera's batteries during the download, and are much less prone to file corruption of the photos during the download. Really, it would be better for the camera user if one of these was included with the camera instead of the cable and bundled software.
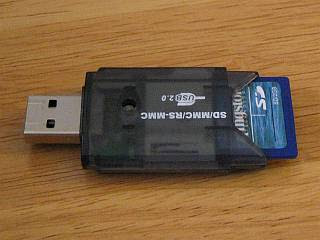
Portable SD Card Reader/Writer
"All in One" Multi-Card Reader/Writer
You place the camera's card in the reader, plug the reader into the USB port, and your computer sees it as a hard drive. You simply copy/paste or drag/drop your photos onto your hard drive. For this simplicity, most professional photographers utilize card readers exclusively. You'll save yourself a lot of heartache if you convert to using one of these.
Here are examples from Amazon. Don't be fooled by the cost. Some of the most inexpensive ones work just fine. But make sure that you do read the reviews first before purchasing. Also make sure that you get a reader that is clearly stated capable of reading your card, particularly if you use SDHC, XD, CF, or MS cards.
For international readers of this blog, and even those in the US, here's another source for card readers (free international shipping too :-). I use the $1.95 portable SD/SDHC card model (SKU7230), and it works great. Note that the free shipping can take up to three weeks though as they're located in Hong Kong.
Now go throw away that cable and go download your photos.
Everything seems fine with your camera, except that when you press the shutter button nothing happens! On Canon cameras you may also notice flashing yellow/orange lights by your viewfinder. Try switching to any mode other than automatic, turn off the flash, and press the shutter button. Did the camera take a picture? If so, continue reading.
Many cameras have a safety feature that prevents the flash capacitor from charging if the case is opened. This is to lessen the chance of electric shock. They usually use one or two of the screws along the perimeter of the camera to complete a circuit that lets the processor know that the case is closed. Verify that all the screws are in place along the perimeter of your camera, and that there are no gaps along the perimeter seams. If you're missing a screw, try using one of the others to replace it.
If they're all there, next thing to check is the batteries. The brand that you're using may have reached its shelf life, or just may not have sufficient power to charge the flash capacitor. Try a better brand, or better yet rechargeable NiMH batteries.
If the above didn't help, then the flash tube or its circuit is probably at fault. In this case, would then recommend professional repair. This repair is somewhat difficult, requires some soldering, has some danger of electrical shock, and goes beyond what I'd like to describe here.
First off, for those owners of Canon Powershot A530/A540 cameras, please see this post first, then return here if your camera is not on the advisory list.
For all other cameras that use AA batteries, are you still using alkaline batteries? If so, alkaline batteries (or worse yet "super heavy duty" batteries) just don't have the power for more than a few pics in today's digital camera. Some may even have problems just powering startup of the camera. This may be true in some cameras, even if they're brand new and straight out of the package!
Digital cameras for the most part should only be used with rechargeable NiMH batteries. These days many retailers sell these for around $7 for a package of four (about $15-19 for the batteries with charger). Keep in mind they'll save you big bucks in the long run over alkalines, AND they'll last for at least 100 pictures per charge (and probably many, many more). You'll be very pleased with their performance, and may slap yourself for not buying them sooner. When at the store, look on the package for a power rating of at least 2500 mah.
Finally, if you're still having problems even with rechargeable batteries, you may have not set the camera's menu setting to recognize NiMH rechargeable batteries. Some camera brands (Samsung in particular) have a setting in the camera's menus to differentiate between Alkaline and NiMH batteries. If the menu is set to alkaline, the camera may in error report a low battery status with NiMH batteries. To correct the problem, merely find the page in the camera's menu to set the battery type, and reset it to rechargeable batteries.
Similar to Canon and Sony, Fuji has also promised to REPAIR FOR FREE its cameras experiencing symptoms of a defective CCD under their recall advisory. You may have to pay for shipping to the repair facility (I would strongly argue reimbursement with them). Some symptoms of a defective CCD include distorted images or abnormal colors, scratchy purple lines, blank or black pictures, and/or black videos with good sound being recorded on the camera's flash card. You may suspect that the camera's shutter is not opening, but this is not the case. Fuji digital still camera models that are affected include:
Advisory Camera Models and Serial Numbers
FinePix A303
Serial Numbers 3JA4**** through 3JA5****
FinePix F410
Serial Numbers 32A1****, 32A6**** through 32A7****, 32A9****
FinePix F700
Serial Numbers 33A0****, 34A1****
Had a little difficulty finding this advisory (makes it seem like they're hiding it hmmmmm? If so, shame on them!), but use the following instructions at the Fuji website: (UPDATE September 6, 2008: It seems that FUJI has abandoned their repair of these defective camera as the following link no longer works. DOUBLE shame on them!!!)
(Last Update: 13 February, 2014) If this information helps you, please pay it forward, and share this article with others who may be experiencing the same problem. Your help in sharing will be appreciated, and karma will prevail!
This has to be THE most common failure mode for a digital camera, a stuck lens, jammed lens, or a malfunctioning lens. Some common error messages that might show up on the LCD's of cameras with this problem include “E18 lens error” (older Canon Powershot), "ACCESS" error (Sony Cybershot), "Zoom Error" (Fuji Finepix), "Lens Obstructed" (Kodak Easyshare), “lens error, restart camera” or just "lens error" (Nikon Coolpix and some other camera makers lately are using this variation). Some cameras might show nothing at all, but merely make a beeping noise as the lens goes out, then in, then the camera shuts off. Sometimes the lens won't even move.
The problem is actually quite common throughout all camera brands. Usually it's sand or grit interfering with the lens extension mechanism. Or the camera's been dropped with the lens extended. Or the camera has been powered on, but the lens had been blocked preventing its extension. Or the battery ran down with the lens extended. Believe it or not, one BIG contributor to lens errors is using a camera case. Sand, gunk, case fibers, etc... accumulate at the bottom of the case. These materials love to cling to the camera by electrostatic build-up from the camera rubbing against the side of the case (especially those cases with soft fibrous intreriors). Once these materials work their way into the lens mechanism, that's all she wrote. I have many Canon's, and NEVER use a case for this very reason.
Note that this problem applies to ALL cameras with telescopic lens barrel (optical) zoom. With Samsung's release of the Galaxy S4 Zoom, I'm really curious to see if this will also be a issue/problem with this camera phone (and other phones with optical zoom). I predict (on June 16, 2013) that it will, as most people carry their phones in pockets and purses. If it occurs, Fix 5a would likely be the best technique to correct this problem.
A camera owner that suffers this problem may have no recourse for having the camera repaired. Many camera makers will not honor repairing this problem under warranty as they claim it is due to impact damage to the camera, or sand or debris getting into the lens gearing mechanism (neither of which is covered under warranty). The quoted repair cost is usually close to or more than what the camera is actually worth.
Fortunately, about half the cameras that suffer this failure can easily be fixed by one of the following methods. None of these methods involve opening the camera, although some have potential to cause other damage to the camera if excessively done. If the camera is still under warranty, before trying any of these, please please first contact your camera's maker to see if they'll cover the repair, or to determine how much they'll charge for the repair. Who knows, you might get lucky. But if they quote you a number that's higher than the value of your camera, you may want to consider the following methods.
First here's a video summary of most of these fixes, and following that a detailed text description of the fixes. Recommend reading the text first (along with the reader's comments and tips section) as these provide additional tips for situations that the video does not. For example, the video focuses on repair fixes for a camera that does not have obvious damage to the lens barrel (such as from a fall). Thus it does not cover straightening the lens barrel if it is crooked, which the text does. Use the video primarily for further clarification on how to conduct these fixes if you have questions.
Video Summary Fixes 1 through 7
The methods are listed in the order of risk of damaging your camera. Thus make sure you try them in the listed order. And remember, these fixes (especially #6 and 7) should only be considered for a camera that's out of warranty, who's cost of repair would be excessive, and would otherwise be considered for disposal if unrepaired:
Fix #1: Remove the batteries from the camera, wait a few minutes. Put a fresh set of batteries back in (preferably rechargeable NiMH 2500mah or better) and turn the camera on. If using rechargeables, and they're more than a year old, consider purchasing new rechargeable batteries as they may not be providing sufficient power to startup the camera.
Fix #1a: If new batteries didn't work, try pressing and holding the Menu, Function, Function Set, or OK button while turning the camera on. This along with Fix #1c and #2 sometimes work for lens errors that occur from batteries wearing down while the lens was extended.
Fix #1c: For those of you who can still access your camera's menus with this error, try finding and selecting the "factory reset" option to set your camera back to its original factory condition. On some Canon cameras, this requires holding the menu button down with the camera powered on for up to 10 seconds. However note that a lens error might sometimes override the reset option, and thus the option might not appear.
Fix #2: If the camera's batteries ran down completely while its lens was still open, the camera may show a lens error or not start properly when new batteries are installed. Remove the memory card and keep it removed, then install the new batteries. When you turn the camera on with the card removed it may come back to life, as this triggers a reset in some cameras. Error E30 (for older Canon's) means that you don't have a memory card installed, so turn it off, slip in the SD card and turn it on one last time
Fix #3:Insert the cameras Audio/Video (AV) cable, and turn the camera on. Inserting this cable ensures that the camera's LCD screen remains off during the start process. Thus extra battery power is available to the camera's lens motor during startup. This extra power can be useful in overcoming grit or sand particals that may be jamming the lens. If the AV cable doesn't fix the lens error by itself, consider keeping this cable installed while trying fixes 4, 5, and 7 as a means to provide extra power to help to these fixes. But note that I DON'T recommend keeping the cable installed during Fix 6 as you may damage the AV port while tapping the camera. Reinsert the cable only AFTER tapping the camera.
Fix #4:Place the camera flat on its back on a table, pointed at the ceiling. Press and hold the shutter button down, and at the same time press the power-on button. The idea is that the camera will try to autofocus while the lens is extending, hopefully seating the lens barrel guide pins back into their slots.
Fix #5:Blow compressed air in the gaps around the lens barrels with the idea of blowing out any sand or grit that may be in there jamming the lens. Other variations include blowing with a hair dryer in “no heat” setting, or sucking the gaps with a vacuum (careful with this one). Some people also have actually used a "Shop Vac" with this fix to help extend a retracted lens.
Now we're entering into the realm of potentially damaging your camera in conducting the fix. There is definitely some risk here, so take care when conducting the following fixes:
Fix #5a: If you actually do notice sand particles stuck in the gaps around the lens barrel, and blowing air does not help to dislodge them, consider using a thin piece of paper or a sewing needle to help dislodge them. Pay particular care not to scratch your lens barrel with the needle. Also, I do not recommend probing too deeply around the lens barrel with the paper (don't go more than a 1 cm or 1/2 in) . Particularly I do not recommend probing deeply around the most outer (largest) lens barrel gap, as you may dislodge the lens barrel dust gasket that's located just inside of that gap.
Dislodging Particles from Lens Barrel Gaps (Fix #5a)
Fix #6: Repeatedly tap the padded/rubber usb cover on a hard surface with the intent of dislodging any particles that may be jamming the lens. Other variations include hitting a side of the camera against the palm of your hand. A lot of people have reported success with this method. HOWEVER, there is also some obvious potential for damaging or dislodging internal components with this method, such as unseating ribbon cables, or cracking LCD screens.
Fix #6a: This is a variation of Fix #6, and should be tried if the lens barrels appears straight (not crooked). In other words, try this if there's no obvious mechanical damage to the lens barrels that's causing the problem. With the lens pointed down, try "gently" tapping around the lens barrels with a small item such as a pen or pencil. The idea is to try to dislodge any sand particles that may be jamming the lens barrel stuck. Simultaneously try turning the camera on and off as you're doing this.
Dislodging Particles by Tapping (Fix #6a)
Fix #7a: Note that this particular fix is intended only for cameras with lens barrels that try to extend, but then stop partway, and then return to their stored position. Try grabbing and holding the smallest inner lens barrel at its furthest extended position, preventing it from returning to the camera. Examine and clean around the lens barrel any noticed dust or dirt. Turn off and restart the camera again. If the lens extends even further, grab it again at its furthest extension, preventing it from returning. Clean again. Keep repeating until the lens is fully extended. Turn off the camera and restart it to see if the lens error has gone away.
Fix #7b: The most extreme of the fixes. Only consider this fix as an absolute last resort before tossing the camera, as there's some obvious potential for further damaging your camera by using this method. You especially might consider this if the lens barrel appears obviously damaged, bent, or crooked such as from a fall. In that case, try thinking of the lens as a dislocated shoulder. Try forcing the lens to straighten it and put it back in its place. In such cases, the lens barrel guide pins have become unseated from their guide slots (see the below illustration). Your objective would be to try to reseat them by straightening the lens. Listen for a "click" to hint that they've been reseated, and immediately stop forcing the lens at this point. More people have reported success with this method than with any of the other methods (see the polls in the right column).
Variations to Fix #7b include gently pulling, rotating, and/or twisting the lens barrel while hitting the power button. Examine the lens barrels closely for any hint of tilt or unevenness. Again, the goal is to attempt to straighten or align the barrel if it's crooked or twisted. Another variation includes looking for uneven gaps around the lens barrel, and then pushing on the side of the lens barrel that has the largest gap (note pushing the lens barrel all the way in is NOT recommended as it may become stuck there). Again, while doing any of the above, listen for a click that indicates that the lens barrel guide pins may have reseated in their guide slots. If you hear this click, immediately stop and try the camera. The following photo illustrates unseated guide pins that would cause a lens error.
If you try these fixes, please vote or post a comment on how the fixes worked for you. Your experience may help others. Note that most of the fixes listed here actually come from my reader's comments. If the above fixes didn't work for you, then please read through the reader's comments, especially the newer ones. There are other techniques listed from readers there that just might work for your situation. When posting a comment, please specify your camera model, and the particular fix that worked. Please also comment if none of the fixes were successful, or if you tried something different that worked.
References:
Canon E18 Lens Error – This is the big kahuna of all E18 error camera repair sites:
Make sure you also read their post section to hear of other peoples successes and failure in fixing this problem:
More Canon E18 experiences and fixes at The Juggle Zone.
The E18 Error Experience Log. Even more Canon E18 experiences, plus a good listing of E18 errors by Canon model:
Nikon Coolpix L3 Lens Error - This site has a few other fixes not listed here that are applicable to the Nikon Coolpix cameras:
Jancology.com Nikon 5700 Lens Error - More people's experiences with lens errors on Nikon cameras:
SD600 Disassembly - Included this as an example of how sand can easily gum up the small gears within your camera. The website also shows a simple method for cleaning these gears.
Finally, I'm curious just how many people actually read this far down into this article. For those people, here are two totally unrelated videos (to this subject) on video editing using freeware. Enjoy!
For camera owners other than A530/A540 experiencing short battery life, or for A530/A540 owners that are not on the below described advisory list, please see this post instead.
Some Canon Powershot A530 and A540 cameras are subject to an advisory recall. It seems that a little hinge spring in the door of the battery compartment can stick out and short the batteries. The end result is very poor battery life, with only a few shots taken before the batteries die. Also the battery door becomes hot.
The good news is that Canon will fix this for free, with free shipping, regardless of the camera's warranty status. Please see this link from Canon.
When contacting Canon, recommend that you print out the above linked advisory and have it in hand. Also, please review the following article concerning a similar Canon advisory for a faulty CCD image sensor.
This should be handled in the exact same way. As stated in the above article, be on guard and respond immediately should you get any feeling that you will be responsible for ANY charges. Repair of your camera should be free and painless.
If this information helps you, please pay it forward, and share this article with others who may be experiencing the same problem. Your help in sharing will be appreciated, and karma will prevail!
The photo recovery software listed here are truly "no-kidding" freeware. Try any of the eight below linked freeware photo recovery software programs. With this software, it's usually no problem at all to recover your lost pictures and videos. There's no catch. They are, no-kidding, FREE, and have been verified by CNET to be safe for your computer.
For those of you with corrupted memory cards, or state that a format is required, please scroll down and see the corrupted card located procedures near the bottom of this article.
Note that these programs may require the use of a card reader, so think about getting one if you don't have one already. They're VERY inexpensive these days, and may be found on Amazon). What's a card reader? See this other article on card readers from the blog.
Example USB SD Card Reader ( $2 with shipping on Amazon)
If you own a camera, there's no reason not to own one of these!
For Mac Users:One of the listed programs works on both PC's and Mac's (PhotoRec). PhotoRec is an excellent program, and will likely recover your files. If PhotoRec doesn't interest you, then see this blog review of other data recovery freeware for the Mac.
PC Free Recovery Software Performance Comparison
The below listed table outlines the current results of performance comparison of the software listed on this site. This comparison was made using an old 64MB SD card that had been previously erased, formatted, and reused many times. I no longer use this card, and hold onto it only so that I can run head to head comparisons of recovery software. I utilized "deep scan", "surface scan", or "intensive mode" where applicable/selectable, to give each software its best shot at recovery.
And here's my video review of this software.
IMPORTANT point to remember before using any of these programs: Always remember to save your recovered files onto a different memory device than the problem device.This will prevent accidentally overwriting your lost files before the program has had a chance to recover them. For example, if your lost photos are on a SD memory card, set the program to save your recovered files onto your computer's hard drive or a flash thumb drive, and NOT back onto the same memory card.
If you have trouble installing any of these programs with Vista or Windows 7, remember to right-click on their installation file and select "Run as Administrator".
#1: PhotoRec by CGSecurity.org (Windows 2000 though 7, Linux, Mac OS X and many more)
This is absolutely by far the most powerful and most effective freeware photo recovery software that you can find/use. As expected, in the performance comparison it came out on top. It not only recovered all photos, but also their thumbnail files. It also found one additional mp3 file that MiniTool missed. The only drawback of PhotoRec is that it does not have a graphic user interface, and is command line prompted (thus it's portability across many operating systems).
This may scare the average person from using it. They shouldn't be, as it is not too difficult to use. As proof, please see the following tutorial on how to use PhotoRec for photo and video recovery. You'll see that it can be easy. The latest version of the PhotoRec may be downloaded directly from CGSecurity here. The program also comes bundled with another program (TestDisk) which isn't really needed for photo recovery (ignore it if you're only interested in recovering photos from your memory card). But it is a superb program for those of you attempting data recovery of your hard drive or other devices.
Digicam Photo Recovery used to be here. Unfortunately, Digicam has gone payware since when this article was originally listed, and as such has been removed from this article. But this spot is being left open, as there are several other freeware candidates that I plan to include here in the near future.
#2: MiniTool Power Data Recovery Free Edition (Windows 2000, XP, Vista, and 7)
This software came out in 2011, and I have to admit, it is very good. Note that this program allows 1GB of recovery for free, but anything more requires the payware version. I've listed it in this article as 1GB may be satisfactory for most people. Ran a performance comparison of all the listed software, and it came in second, recovering nearly all known deleted images, videos and mp3's on the card. Albeit, it did miss some unneeded thumbnail files and a single mp3 that PhotoRec caught. But it remains one of my favorites as it's almost as powerful as PhotoRec, yet has an excellent GUI that should make it easy for the average person to use. It's also very quick, and relatively easy to use. You may download MiniTool Data Recovery Software from the vendor here. Again 1GB of recovery is free, and any more requires the payware version. And here are simple instructions that I've written showing how to use the program.
#3: VAIOSoft Recovery Manager (Windows 95 through XP)
If none of the above options worked for you, then here's another fine example in free recovery software. Not as simple as some of the others, but it definitely gets the job done. In fact, it came in third in my performance comparison of recovery software! It was able to recover all the known deleted images on the card as well as 4 known erased mp3's. However, one of the recovered images may have data from a video embedded into it due to its unusally large file size. But still, this program did better than most others evaluated. It's 3.2 megs in size and requires an install. Although CNET says it's good for up to Windows XP, I was able to install and run it on Windows 7. Download VAIOSoft Recovery Software from Yahoo here.Windows 7 useres, remember to right-click and run as administrator for this type of installation. And here are some simple instructions that I've written showing how to use this program.
#5: PC Inspector Smart Recovery (Windows 95 through 7)
NOTE Windows 7 users must right-click and select "Run as Administrator".
Had to add this one to the list. This will recover files from flash card reader, hard drive, or just about any drive (but not directly from a camera). It's slower than all of the above BUT and I mean BUT this software is thorough. This one will very likely work in recovering your photos if the others had failed. It was able to recover all known images on the card. However, one of these images obviously has other data embedded with it due to its large file size. The program was not able to recover the known deleted "MOV" video on the card, and does not have mp3 recovery capability. As such, it came in as #5 for still being able to recover all of the known deleted images. You can download PC Inspector Photo Recovery Software from the vendor here. Windows 7 users, remember to right-click and run as administrator for this type of installation. And here's some instructions.
This software package includes a good Wizard interface. The program is good, and will likely recover (Recuva?) your files. But for best results with this program, I found that I needed to select "Switch to Advanced Mode", and then adjust the "Actions" tab settings. Once I did that, previously missing files would suddenly show up with this program. But even with "advanced mode" and running a "Deep Scan", the program was only able to recover 6 of the known 10 images. Although ranked #6, it performs at a tie with Pandora, which also ran a "Surface Scan" to recover the same 6 images as Recuva did. You may download Recuva from its vendor here. And here are some instructions for its use.
#7: Pandora Recovery (Windows 2000, XP, and Vista only)
This one is also good and works under Vista too, which is always a plus. You can do intensive deep scans for those deleted photos from long ago (though it will take time, results will vary), or you can do simple scans for those easily recovered recently deleted files. This tied with Pandora, as it was only able to recover 6 of the 10 images on the card. You can read about Pandora's features here. And you can download Pandora Recovery from SoftPedia here.
#8: SoftPerfect File Recovery (Windows 95 through Vista)
Ahhh, the beauty of simplicity (can work with most OS)! This one is very tiny (276kb) and recovers any file type by specifying searches for "*.jpg", "*.avi", "*.mov" etc... It's very fast too! It's a single executable file that does not require installation. Controls are simple and minimal. Manually highlight the files that are to be recovered, and right click to save them to a folder. Unfortunately, this program seems to work best (and maybe only) for recently deleted files. Also unfortunately, it wasn't able to recover any of the photos on the 64MB test card, possibly because I had done a quick format in the past with this card. As such, it may not be capable of recovery for anything more than simple deleted files. But for most people who just accidentally hit the delete button, that's all they may need. So it still may be of use, and I keep it listed here. Download SoftPerfect File Recovery from its vendor here.
Now that you know how, go recover those "lost" pics of Aunt Lucy! Also, please remember to vote in the poll in the right column on which software worked best.
or For Memory Cards that state that formatting is required.
The following describes procedures for those with corrupted cards. Most of you should not need to conduct these procedures. These procedure are intended only for people with cards that are not being recognized by either the computer or the camera, with either stating that a format of the card is required. If you do conduct these procedures, please leave a comment stating how they worked (or did not) work for you. These procedures are new, and I'm still modifying them for this article:
It is common for a memory card to become corrupted. This usually occurs if the card had never been formatted prior to use in your camera. It may work fine at first, but with time, as many files are added, problems with the card will inevitably crop up. There are several other reasons for a card to corrupt, but the above is the most common.
When a card corrupts, files may start to disappear that you know are on the card. Sometimes the card may also become totally unrecognizable by both your camera and computer. You may receive notification from both that the card requires formatting. You may become alarmed that if you do format the card, you might not be able to recover your pictures.
In actuality, it all depends on the type of format that you conduct. A FAT32 "Quick Format" conducted on your PC will not overwrite the data on the card. Thus recovery is still possible using the recovery software listed in this article. Similarly, if your camera allows you to DESELECT "low level" format, then you should also be able to recover your files after a non-low level format (CAUTION: "low level" format WILL overwrite your files. Stated again, it's important to deselect or uncheck "low level" format in the camera menus).
The following illustrates the steps to take for either your PC or your camera (A Canon is used for this example) to conduct a format that will still allow you to recover your files. Before proceeding, if you're using a SD card, ensure that your memory card's write switch is in its upper "unlocked" position. Then insert the card into your camera, or your computer (using a card reader).
Lock Switch in Upper "Unlocked" Position
Camera Quick Format
If using a camera, find the format menu in your camera. It's usually in the "tools" or "settings" menu. If unsure where its at, look for a selection that states you cards memory size and select it.
Camera Format Menu Selection
Look in the camera's menu to see if it has the ability to deselect (uncheck) "low level" format. Uncheck this selection, and then select and conduct a format. If your menu does not allow you to deselect "low level", then look for a "Quick Format" option. If your camera's menu doesn't have either option, it might be better to skip this step (avoiding an inadvertent low level format) and instead proceed to quick formatting by using your PC. Once your camera completes its quick format, attempt to recover your photos using any of the software listed above.
Low Level Format shown UNCHECKED in menu
PC Quick Format
Your card can also be quick formatted in your PC. But after you've recovered your photos, you should still format the card in your camera to prevent this from happening again. Place your card in a card reader, and if using a USB reader, insert the card and reader into your PC. Wait for the reader to be recognized by your PC. Once your reader is recognized, right click on its selection in "My Computer" or "Computer", and select format.
Once the format menu comes up, double check that the card reader is actually selected in the upper bar of the menu, and that you didn't accidentally select one of your other drives (that would be very bad). Once you verify that the card reader is showing in the menu, select "Quick Format" by checking the box in the menu, and then press start.
Quick Format Box "CHECKED"
Once the quick format is completed, you should be able to directly proceed to recover your files using the card in the reader with the software listed above. AFTER you've successfully recovered your photos/videos, remember to format the card once again IN YOUR CAMERA using the camera's format feature. This may help prevent what just happened to you from reoccurring again in the future.
THE BEST WAY TO SHOW YOUR APPRECIATION is to share this resource with others who may be experiencing the same problem that you had. You may have seen them in the search that led you here. If in your surfing of the internet you come across others experiencing similar problems with their camera, please be kind and direct them to this site.
Thanks, CR
Why this Blog?
PLEASE READ THIS ! Oh no! You've dropped your digital camera. And it's out of warranty. And repair costs more than the camera is worth. What to do short of tossing the camera (or selling on ebay)? Well, believe it or not the average person has a good chance of diy fixing that camera themselves. All they'll need for most cases is some patience, and a little background knowledge. The intent of the posts on this blog are to help provide that knowledge.
But now for the WARNINGS! Many of the repairs posted here should only be considered as a last resort for a broken camera that would otherwise be considered for disposal. Also please consider those repairs that require removing the camera case to also require some electrical background and knowledge, and should not be attempted by anyone unfamiliar with basic electrical components and safety precautions.
Make sure you read this post and are aware of the potential DANGER OF SEVERE ELECTRICAL SHOCK should you decide to proceed with a "do it yourself" repair that involves removing the camera case.
WHAT YOU READ HERE IS NOT PROFESSIONAL ADVICE. Most of the posts and comments in this blog come from amateur repair hobbyists (INCLUDING MYSELF). Take the advice with a grain of salt. YOU MAY ACTUALLY MAKE MATTERS WORSE by following what you read here. Many of these repairs will almost certainly VOID YOUR CAMERA'S WARRANTY.
It's ultimately YOUR RESPONSIBILITY should YOU DECIDE to try some of the repairs posted here.